How to shoot archery correctly. An ancient art turned into a sport! Rules of archery. Name of onion parts
Archery technique is usually analyzed according to the following elements: positioning, grip, grip, bow tension, release (descent), breathing control, aiming.
Manufacturing
Leg position
Body position
Grip
Bow hand position
Capture
Bow draw
Release (descent)
Breath control
Aiming
Archery - This is the process of performing a complex motor action, the main elements of which are drawing the bow and releasing the string. optimal way of performing this motor action. Each archer has his own shooting technique, since all people differ in physical development, body structure, body weight and other parameters. The technical elements when shooting from a sports classic bow differ from the technique of shooting from a compound bow.
MANUFACTURING.
The position of the archer is determined by the position of the athlete's legs, torso, arms and head. Let's look at each element of an archer's preparation separately.
Leg position.
The archer (right-handed) usually stands with his left side to the target. Legs, which provide support for the whole body, because shooting is carried out in a vertical position, must be straightened. The tension of the corresponding muscles creates a minimum of internal degrees of freedom for the lower extremities and lower part of the torso, i.e. movements in all joints (ankle, knee, hip) should be minimal. This is a prerequisite for maintaining balance and reducing vibrations to ensure immobility of the shooter-weapon system. Naturally, overstraining the muscles of the legs and torso is unacceptable, because this can cause miscoordination in the basic movement control system.
The feet are located approximately shoulder width apart from each other, the toes are slightly turned to the sides. The position of the feet must be constant and not change from shot to shot. It is determined by the location of the characteristic points of the feet (the front and back points of the axis passing through the middle of the heel and the middle of the big toe).
There are three main manufacturing options: open, side, closed.
The choice of one option or another depends on the individual characteristics of the archer. These variations mainly differ in the position of the torso relative to the target line, determined primarily by the position of the feet.

The figure shows the position of the legs in open, side and closed types of position.
The most common currently is the side position.
All three types of preparation in archery are divided into preliminary and main.
Preliminary preparation consists of performing movements that ensure the correct placement of the feet relative to each other and the orientation of the torso relative to the target line. The head is usually turned slightly towards the target. The bow is either held suspended with the left hand, lowered along the body, or rests with the lower shoulder on the left foot and is held with the left hand, bent at the elbow joint.
The main preparation consists of performing the necessary actions for the shooter to assume a position with the bow drawn, until the bowstring touches certain (individual) orientation points on the face (chin, tip of the nose, etc.).
Body position.
In the archery position, this position can be assessed by a conventional vertical axis. Depending on individual characteristics, this axis can be positioned strictly vertically or with a slight tilt forward. With this position of the body it is easier to reduce unwanted touch and pressure of the bowstring on the shooter's chest.
 The position of the torso must obey the basic requirement - to create a biomechanical support and maintain it throughout the entire duration of the shot. In this regard, the work of the trunk muscles should be as variable as possible, which requires constant training.
The position of the body is determined by the location of its characteristic points (the abdomen, pelvis, and the axis passing through the hip joints).
Head position.
The shooter's head is turned to face the target. The neck muscles that hold the head upright and are involved in turning the head should not be overly tense. Otherwise, it can interfere with blood flow, lead to excessive tension in the muscles of the torso and the arm that is pulling the bow, which, in turn, can cause incoordination of movements and, as a result, errors. The position of the head should be uniform and not change during the shooting process, otherwise this may negatively affect the quality of aiming. 
The distance between the eyes (dominant eye) and the arrow shank should always be constant, so the teeth should be tightly clenched. The points (points) of contact between the bowstring and the face (tip of the nose, middle of the chin, to the right of the face) should be constant.
The lower jaw should be in close contact with the upper part of the hand and fingertip, because the hand that pulls the bow moves along the jaw bone and the uniform point of contact serves as a constant guide to the correct movement of the hand.
The leading eye should be located at a certain (equal) distance from the plane of the shot so that the bowstring does not obscure the sight's front sight.
Bow hand position.
The left (usually) hand holding the bow is raised towards the target, straightened and located in relation to the axis of the spinal column at approximately 90° (the change in this angle depends on the shooting distance).
The arm should be straightened and secured at the wrist, elbow and shoulder joints. This consolidation is accomplished by simultaneous tension of the antagonist muscles for each joint. The hand holding the bow actively resists the increasing pressure of the bow as it is drawn. The hand, forearm and shoulder, when pulling and holding a stretched bow, should form a rigid system along with the shoulder girdle and head.
Grab.
The position of the hand is determined by the chosen method of holding the bow ( grip). To hold a bow, there are several types of grip, differing in the location of the palm and fingers on the bow handle: low, medium, high.
Each of them has its own advantages and disadvantages. Common to all types of grip is that the bow handle is inserted into a “fork” formed by the thumb and forefinger.

With a low grip, the back of the handle rests tightly against the base of the thumb, and the side fits tightly against the muscles of the palm. The conventional axis of the wrist joint is located at an angle of 45° to the plane of the shot. The middle part of the hand is located at approximately an angle of 120° to the forearm. With a low grip, the area of contact between the palm and the handle is greatest.
With an average grip, the contact area is significantly reduced due to the fact that the hand is straightened, the angle relative to the forearm is approximately 180° and therefore there is almost no bending between the hand and forearm. The base of the thumb and the bottom of the palm do not touch the bow handle.
With a high grip, the hand is slightly lowered in relation to the forearm, and the area of its contact with the bow handle is further reduced.
The position of the forearm is mainly dictated by the need to ensure free passage of the bowstring when firing. To do this, the shoulder must be pronated at the shoulder joint so as to create a minimum of forearm surfaces protruding towards the shooting plane. the articulation of the forearm with the shoulder should be rigid, these two links form a single whole. Due to internal forces, it is necessary to eliminate possible degrees of freedom in the elbow and wrist joints.
Right hand position.
This is the hand that carries out capture, retention and release bowstring, and also participates in bow tension.
Capture.
The grip in archery technique is the way of holding the bowstring and can be deep or medium.

The most common is a deep grip. It is characterized by the fact that the gripping hand is positioned perpendicular to the bowstring (before the bow is pulled). The bowstring is grasped with three (sometimes two) fingers in such a way that the load on them is as uniform as possible, and the bowstring itself is located on the extreme bend of the distal phalanges of the fingers (index, middle, ring). The rest of the fingers and palm should be as straight as possible. The thumb and little finger should be as relaxed as possible. With an average grip, the bowstring is located approximately in the middle of the distal phalanges of the fingers. The arrow nock fits between the index and middle fingers and should not touch or be pinched when drawing the bow and releasing the arrow. For this purpose, an instep support is installed on the fingertip.
After completing the grip, the left hand raises the bow, the right hand, being in a half-bent state, holds the bowstring.
Before the tension begins, the right shoulder and forearm are located in a horizontal plane, while the shoulder joint should be lowered if possible, the elbow of the right hand is slightly raised in relation to the longitudinal axis of the arrow.
When shooting with a compound bow, a special technical device called a release is usually used to capture and hold the bowstring.
In this case, the release, depending on the design, is either held by the fingers of the right hand (T-shaped), or attached using a leather strap to the forearm (carpal).
Bow tension.
The movement of all links of the right half of the upper limb belt must be coordinated so that the string moves in the plane of the bow. When it is tensioned, the position of the fingers on the bowstring and the general position of the hand relative to the plane of the shot should not change.
The bow is pulled simultaneously by the muscles of the right arm and back. The initial phase of drawing (the first phase) of the bow is carried out mainly by the muscles of the right hand. The middle (second) and especially the final (third) phases of bow tension are performed mainly by contracting the back muscles that adduct the scapula to the spine.
The final phase of drawing the bow is the most important because... immediately before it begins, the hand involved in tensioning the bow passes (or is fixed, depending on the type of technique) through certain points of contact located on the face (the tip of the nose and the middle of the chin or just the chin, etc.). In the event that the hand is fixed under the chin, it has some varieties depending on the position of the fingers: submandibular, premaxillary, cervical.

Currently, the most widespread is submandibular fixation, when the hand is under the chin, the thumb and little finger are relaxed as much as possible. After fixation is completed and aiming is refined, the hand, due to contraction of the muscles of the back and arm, continues its movement along the jaw bone. This movement after completing the fixation is usually called “reaching out”.
With another version of the technique, the right hand touches the face at the same points (the main thing is that these landmarks are always constant), but does not stop, and as the aiming becomes more precise, it slowly moves back along the jaw bone, i.e. the effort to draw the bow does not stop.
During the final phase of drawing the bow, when the hand, being under the chin, moves back along the jawbone due to the contraction of the muscles of the arm and back (the main work in this phase should fall on the back muscles), the arrow comes out from under the clicker, a click will be heard and release occurs. The main requirement for the final draw phase of the bow is that it must continue without stopping after the click of the clicker and while releasing the arrow.
When drawing a compound bow, its character changes. this is due to the design features of the weapon (bow). The main force for pulling is developed in the initial (first) phase (70% of the bow's tension force). In the second phase, there is a fairly sharp decrease in the magnitude of the force (30% of the bow's tension force). When performing the third (final) phase of bow tension, muscle tension is significantly less than in its first phase. It is approximately 30% of the bow's tension force and practically does not change as the hand approaches certain fixation points on the face.
Given these features, it is necessary to pay special attention to the position and work of the hand holding the bow, because increased demands are placed on it to maintain reliable support in the bow both during the first and during the second phases of its tension.
It should also be noted that when shooting with a compound bow using a breaker, the right hand in the final drawing phase is usually located to the right of the face and touches the right cheek, and is not located under the jaw bone, and the draw as such is not performed. However, the tension of the muscles of the back and arms, which perform tension on the bow while fixing the hand and lowering (releasing) the bowstring, should be sufficient to hold it, and its increase should even be subjectively felt. This can prevent the back and arm muscles from relaxing uncontrollably and causing the right arm to “give in” forward.
The movement of the finger performing the release (pressing the release button or the trigger of the disconnector) must be smooth and autonomous so as not to cause an uncontrolled increase in tension on the muscle groups directly involved in the execution of this movement.
Release(descent).
Release - This is the release of the bowstring from its grip. It is performed during the final phase of drawing the bow. The main requirement for release is the instantaneous, simultaneous and complete relaxation of the fingers holding the bowstring. If this condition is met, the bowstring itself, as it were, opens completely relaxed fingers and leaves them with minimal deviation from the plane of the shot.

Relaxation of the fingers and release of the bowstring from the grip occurs when the clicker clicks, but one must always remember that the tension of the bow after the click of the clicker and at the time of release should not be interrupted.
When using a release, the fingers of the hand that pulls the bow and holds the string are not directly involved in its release. The release in this case can be called a descent, because Depending on the release design, the archer presses a special release button or trigger with the thumb or forefinger, which operates the release mechanism to release the bowstring.
When using a release, it is possible to achieve minimal deviation of the string and bow from the plane of the shot, and due to this, the deformation of the arrow is reduced, which ultimately has a positive effect on the accuracy of shooting.
Breath control.
When firing a shot, the archer strives for the best stability of the shooter-weapon system. To do this, it becomes necessary to stop breathing while it is being performed, i.e. eliminate unwanted chest movements. Hold your breath for 10-15 seconds. is not difficult even for an untrained person. This time is quite enough to complete the shot. As the bow is drawn and immediately in front of it, breathing becomes more and more shallow and is held by the archer at a natural respiratory pause, and the stop should be at a moment slightly less than half-exhalation. This is the most rational and natural cessation of breathing, in which a slight tone of the respiratory muscles remains, corresponding to the general tone of the body.
The level of oxygen in the blood and its supply in the lungs is quite sufficient for the normal functioning of all body systems within 10-15 seconds. Moreover, with training, the reflex threshold of the urge to inhale moves away when oxygen in the blood decreases.
With such a breath-hold, the archer does not experience oxygen starvation, i.e. a state of hypoxia does not occur, and therefore there is no need for hyperventilation. In case of hyperventilation of the lungs, the phenomenon of oversaturation of blood oxygen, which is undesirable for the archer, may occur, which causes slight dizziness, uncoordination of movements and loss of stability.
Aiming.
The aiming technique consists of pointing and holding the front sight in the aiming area in the center of the target (usually). The front sight can be rectangular, trapezoidal, dot-shaped, round or ring-shaped. When aiming, the archer primarily sees the sights, the bowstring, and the target. The structure of the eye does not allow one to see the sighting device, the bowstring and the target equally clearly at the same time, i.e. three objects at different distances. Therefore, the eye focuses in such a way that the front sight is most clearly visible, the target less clearly, and the bowstring even less clearly. The string can be located to the right or left of the front sight, which is not of fundamental importance. The main requirement is that the string always be on the same side of the front sight and at the same distance from it.

When aiming when shooting from a classic bow, you must remember that the hand that is pulling the bow should touch the jaw bone and slowly move back by contracting the muscles of the arm and back. The mouth should be tightly closed.
These actions must be controlled, otherwise the distance between the eyes and the arrow may change, which will lead to an error in aiming.
When aiming with a compound bow, as a rule, a level is used to control the position of the bow in the horizontal plane, an optical sight and a peep-site (a special device with a small hole that is attached to the bowstring at the level of the eye involved in aiming). So we can talk about a certain combination of diopter with an optical sight. When the bow is at full draw, the shooter's eye, the center of the pip-sight hole (diopter), the front sight and the aiming point are located on the same straight line.
The line formed by the pupil of the eye, the front sight and the aiming point is called aiming line.
Aiming area - This is the area of a circle bounded by a circle centered on the aiming point. It may be larger or smaller depending on the degree of stability of the bow position. The higher the skill level of the archer, the smaller the area of oscillation of the sight's front sight.
The position of the head should provide the most favorable position of the eyes. In no case should the neck muscles be overstrained, which can lead to incoordination of actions in the final phase of drawing the bow.
Article from the site http://www.archery-sila.ru
Let's start with the fact that I still bought my beloved wife the promised compound bow. The desire to get our hands on a real weapon, and not an entertainment, appeared after last year’s trip to Tunisia, where we were able to shoot a little with an ordinary resource bow, this was described earlier.
Well, this year in the summer we are actively going out into nature every weekend to shoot with pneumatics and crossbows. True, in our case, arbates are extremely inaccurate weapons (apparently, shooting from them and most importantly hitting them takes a long time to learn), shooting from an air rifle is too simple (albeit interesting), and a bow is, damn it, not just exotic - this is a good workout and a wonderful rest.

Of all the variety of bows available for sale in St. Petersburg, I settled on the “Predator” model, sold under the “Interloper” brand; in short, this is the only serious compound bow with a price of 13,500 rubles, which can also be used for entertainment (tension force 13 kg), and, in case of urgent need, even for hunting (the bow’s tension force is adjustable up to 27 kg)
While there are other models of compound bows (from small American manufacturers), the Predator model is distinguished by its sufficient simplicity (like a Kalashnikov assault rifle) and reliability.
In general, the choice was made and the bow itself was purchased.
I was recommended to immediately buy arrows for a compound bow (the price of one arrow is 300 rubles, length 80 cm), but I bought the simplest wooden arrows in advance (100 rubles per piece, length 69 cm). When I asked the consultant why I couldn’t shoot cheap wooden arrows from a compound bow, but had to buy expensive plastic arrows, the answer I received was information about the difference in arrow lengths and nothing more.
Based on practical benefits, given our inability (at the moment) to shoot accurately, buying 10 wooden arrows is the optimal choice (for the duration of training), and by the way, the length of a wooden arrow is sufficient for shooting from a Predator.
I also immediately bought a case for carrying the bow, naturally black, and not provocatively camouflage - we are modest people, we don’t care for unnecessary attention to anything.

I didn’t even write about the most important thing! If you don’t want to break all your arrows after the first shot, buy a special target for archery and crossbow arrows. It is made from a mixture of plastic and polystyrene foam, a kind of foam block, the minimum size of 50x50cm costs 1,500 rubles.
This target is a must-purchase if, I repeat, you don’t want to break all your arrows after the first shot.
The weather was great in the morning and we went shooting not in a car, but on bikes. It is not convenient to carry a target with you, so my wife came up with a special sling specifically for transporting the target. (Making the bandage took about 30 minutes, including the purchase of materials).

We were extremely arrogant and set the target at the level of a person’s chest (right on the bike) and shot from 12-15 meters.
This is where the fun began.
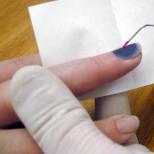
1. An arrow from a compound bow flies very quickly.
2. When properly pulled and aimed, the bowstring hits the hand very painfully.
3. Hitting a 50x50 cm square from 15 meters with a bow is not easy
How to aim correctly:(relevant for classic bows)


The arrow should be at eye level, as shown in the photo.
How to aim incorrectly:(but never mind, if you have a pip-site and a sight on the blocker itself, this is the most correct method)


And when you aim incorrectly, the arrow flies in a completely unknown direction...

and finally:
Rules for safe handling of onions
Improper handling of a bow can be dangerous both for the shooter and for the people around him.
Bow failure occurs rarely and, as a rule, is due to the shooter’s inattention to his weapon.
Before each shooting, you must carefully inspect the weapon to identify obvious signs of wear or damage to its parts. A frayed bowstring, protruding threads of steel cables, cracks on the arms of the weapon - these and other external signs of problems should alert the shooter. It is necessary to check the installation of the sight, the presence of screws, nuts, etc. and, if necessary, tighten them
When stretching the bow there should be no creaking or crackling noise...
The arrows must match your bow in size, length, weight, and stiffness (this must be done based on the tables of arrow manufacturers; the minimum permissible arrow weight is also indicated on the bow itself, among its other characteristics)! Shooting arrows that are too light can cause the weapon to quickly break down. It is necessary to check the integrity of the tubes and arrow shanks. Shanks that snap loosely onto the string need to be replaced. Shooting with questionable arrows is absolutely unacceptable!
A stranger in whose hands the bow he is interested in should be warned about the inadmissibility of the so-called “dry shot” (a shot without an arrow in the bow), in which AS A RULE the bowstring and/or cables break and the arms can be damaged or even broken. A stretched bowstring, if there is no arrow inserted into the bow, must be released smoothly!
When preparing to fire, the shooter must make sure that there are no objects in the area of the upper and lower blocks that they can hit when straightening their shoulders. The authors happened to hold a bow in their hands with a crumpled upper block that hit a low ceiling beam when fired. In that case, the bow cables were also damaged, and the bowstring was torn.
Often, after stretching the bow, the shooter forgets to put the arrow on the shelf. With such a shot, the arrow hits at a distance of 1-1.5 meters to the right and up to 1 meter below the target (when shooting at a distance of 18 m). At a minimum, the shooter loses 1 arrow from his arsenal, despite the fact that such a miss can be dangerous for objects located next to the target shield.
Speaking of arrows. You need to carefully remove the arrow from the target shield, grabbing the tube from the shield and gradually intercepting it with your hand. When removing an arrow, it is important, firstly, not to bend it, and, secondly, not to injure the person next to you when the arrow is suddenly pulled out of the shield.
Correct shooting technique
Proper shooting technique is just as important as a well-tuned bow, of course, if you want
shoot accurately and smoothly. While each archer's shooting style may be different, you need to have the right technique to shoot accurately.
Proper technique is akin to sighting on a rifle. If the sight and front sight are accurately brought together, and the shooter holds the weapon firmly in his hands, then the bullets will fit exactly into the bull's eye with each shot. If you aim incorrectly or move the muzzle between shots, then the bullets, accordingly, will scatter chaotically throughout the target. The same is true with bows and arrows. If you
shoot arrow after arrow using the correct technique, and the result will be appropriate - right on target. . If at some point you make a mistake, the arrow is unlikely to fly where
would you like. Therefore, in the early stages it is very important to comprehend and consolidate the correct technique, so that later, having already had a general basis, develop intuitive shooting skills.
BASIC ELEMENTS OF CORRECT TECHNIQUE
SHOOTING
To master proper shooting technique, you need to pay attention to 9 basic elements. Although it may seem like it will take you a long time to remember them all, it will actually take you only a few seconds to remember them all, especially if you practice. At first, every move you make, according to the program, must be weighed and thought out.
Then you will develop muscle memory and reinforce everything with practice. Practice your technique until it becomes a habit. Only then will you be able to fully concentrate on the main task - the target.
Manufacturing
Posture, or how you stand in relation to the target, is very important because in order to fully utilize the muscular potential of your upper body, you must adopt the correct stance. Start by turning your body at a 45° angle to the target. If you are right-handed, your right shoulder should be back and your left shoulder should be pointed towards the target. If you are left-handed, then, on the contrary, your left shoulder will be pulled back and your right leg will be pointed forward towards the target. In any case, the leg distant from the target should be parallel to it, and the toe of the second should point in the same direction in which the body is turned.
To better maintain balance, your feet should be shoulder-width apart or slightly wider. Bend your forward leg slightly at the knee, thereby shifting 1/3 of your body weight to it. This stance will allow you to turn and tilt your body while maintaining excellent balance. If you are shooting at a target that is higher or lower relative to you, it is very important to tilt your body when aiming your bow at the target. Never raise or lower the bow hand itself, as this can throw you off your aim and cause the arrow to fly above or below the target.

When aiming higher or lower, alwaystiltframe.
Grip
If you grip your bow too tightly, it can cause slight bending and deformation, which can result in the arrow's flight path shifting to the right and left and therefore
will lead to a miss. If, on the contrary, you hold the handle too loosely, then when you release the bowstring, the bow may simply fall out of your hands. The bow must be held firmly so that the plane of the shelf coincides with the line of the bones of the forearm and wrist. If you mentally extend the line of the shelf towards you, make sure that its plane coincides with the line of the wrist. This type of grip allows
provides the best grip on the bow and distributes pressure evenly across the joints. The shape of the handle can also affect the wayholding the bow. Modern handles allow you to use
high, medium and low grip.

All you need to do is hold the bow firmly. Don't tighten too much, but don't relax either.
Tension
There are several opinions on how to properly draw a bow. Some archers aim the bow first into the ground and slowly raise it as the bowstring is tensioned and fixed.
Others argue that the best solution is to lift the bow under at an angle of 40 degrees to the target and, pulling, slowly lower it.
This method is best suited for hunters, since this way you make fewer unnecessary body movements. In addition, with such a tension on the bow, it will be clearly visible from the side whether the bow is strong enough for the shooter or not. If the bow is too strong, then the archer will have to lift it up a little against his will or begin to make strange circular movements with the bow in order to fully draw it. Therefore, if you cannot draw back the string calmly and smoothly, then this bow is too strong for you.
The bowstring is caught joints of the first (nail)phalanges of all three fingers of the right hand involved in pulling the bow (i.e.index, middle and ring -
Note lane). It is very important that the joints of the phalanges are located on the same straight line, thus the pressure of the fingers on the bowstring and, accordingly, on the shank of the arrow will be uniform. Such a “hook” grip of the bowstring requires less effort to hold the bow in a tense position and allows it to be better released when launching the arrow, which naturally has a positive effect on the flight of the arrow. Moreover, it gives
an opportunity to give the muscles of the palm and forearm a little rest, forcing the muscles of the shoulder and back to work as they should. Proper shooting technique helps to best distribute
pressure on muscles; The main work of tensioning and holding the bowstring is done by the muscles of the shoulder girdle, and not by the palm and forearm.
If you are having trouble releasing the bowstring smoothly when gripping it with your front knuckles, make sure your fingertip or glove does not have creases in the area
contact with the bowstring. Such creases can appear over time and cause the bowstring to get stuck. Therefore, if you suddenly find creases on your fingertip or glove,
This means it’s time to change them. If you still have trouble releasing the bowstring clearly, try gripping it with your fingertips instead of your phalangeal knuckles. However, this may
more effort from the fingers and increased attention will be required to evenly distribute the pressure of all three pads on the bowstring.
Firm position of the hand holding the bow
Imagine that your hand holding the bow handle is the barrel of a gun. If your hand constantly moves in the air or shakes too much while holding the bow, it will naturally affect the flight of the arrow and you will most likely miss. Therefore, when you fully draw the bow and hold it in that position, your hand should be rock-solid the entire time until the arrow reaches the target. Most likely, you will have to bend your elbow slightly so as not to impede the free passage of the bowstring. In addition, bending your arm at the elbow will help relieve excess pressure on the joint and thereby avoid possible injury.
Applying the brush under tension
There are several opinions regarding the correct position of the hand when drawing the bow. It largely depends on yourshooting style. Three-fingered low grip, in which the phalanges of all
Three fingers involved in tension hold the bowstring directly under the shank, which will bring the plane of the arrow closer to the eye. In this case, the best solution would be to press
the tip of the index finger to the corner of the lips.
 |
If you are using a slotted grip - one finger on top and two under the shank - try pressing the tip of your middle finger to the corner of your lips. Everyone's head size, shape, and finger length are different, so you'll have to figure out the best way to place your hand. However, it is very important that the wrist position is the same with each shot. Constant application of the brush will result in consistent accuracy when releasing the bowstring.
Once you have drawn and secured the bow, make sure that the forearm of your drawing hand is in line with the arrow and that your extended elbow is in line with your grip hand. Think of it as the butt of a gun. Head position is just as important as proper string tension. The line of the arrow should pass exactly under the eye. To top it off, if you are right-handed,
tilt your head slightly to the left and lift your chin so that the arrow is parallel to the line of your right eye-target.
How long to hold the bow in a taut position is up to you.
When you are sure you have good aim, release the arrow. If not, then keep the string fixed until you are completely ready. If you suddenly start shaking and can no longer hold the bow straight, lower it and rest. Nobody said that once you pulled the bow, you must shoot.

The best position of the brush when fixing the tension is the tip
the middle finger is pressed to the corner of the lips.

Proper alignment of the bow arm, elbow and hand,
pulling the bowstring is the key to correct shooting technique.
Visual memory
Over time, as you gain more and more experience in intuitive shooting, you will develop the so-called visual memory. Your eyes see the target, your brain processes the information received, determines the distance and sends a signal to your body, and your body responds by pointing the bow at the target. Once you have fully developed your skills, the whole process will begin to take a few fractions
seconds. But developing these skills will take time and hard training. Before you even begin to draw your bow,your look should alreadybe focused on the goal. There should be nothing left around you except the goal. Clear concentration andcomposure with every shot- this is the key to good visual memory.Some archers use special equipmentaiming at the top of the tip. We won't teach you this because we don't use it ourselves.method, but you, be that as it may, musthave an idea of what we are talking about. In this case, the archer uses the tip of the target orblade tip asfront sight, raising or lowering it relative to the target depending on the distance. Accordingly, the closer the shooter is to the target, the lower he lowers the tip. And vice versa, the further he is from it, the higher he lifts the tip. Although at this
bow shooting system and a sight as such is not installed, everything to the archer It is equally necessary to know the exact distance to the target. Therefore, this method of aiming is mainly used by archers performing in tournaments, since accurate distance measurements are taken there.
Breath control and bowstring release
These two aspects of archery The shooting goes on inseparably. Research has shown that if you exhale air from your lungs when launching an arrow, the trajectory will be very high. If, on the contrary, you inhale at the moment of releasing the bowstring, the arrow will fly low. Does this mean you should hold your breath? Yes, of course, but only to the extent necessary to launch the arrow. The following exercise will help not only archers shooting at a target, but also hunterswho just needcalm down just before releasing the arrow.
So, take a full lungful of air and exhale slowly. Inhale deeply again, exhale half and hold your breath, draw the bowstring, aim and shoot. Another method of breathing control is used by snipers, and is still used in the army:without specifically exhaling,just givethe air slowly leaves the lungs and holds your breath for a fraction of a second, sufficient to fire the shot.
Proper release of the bowstring is the key to a good arrow flight path. After pulling and fixing the bow, make sure that the string does not creep forward. The fingers should be straight and not
clenched into a fist.

To achieve the most perfect string release possible and to fully utilize the bow's full potential, try to maintain a constantcounter tension. Having pulled and fixed the bowstring, concentrate on the target, and as the bowstring slides off tips fingers, try to move the elbow of the pulling arm back, using the muscles of the shoulder girdle and back. By pulling your elbow back, you are pulling your arm andfingers from the fixation point, allowing the string to slide freely.
Some archers who engage in intuitive shooting never linger at the fixation point, while some, after drawing the bow, fix their hand in this position for a split second, and
then continue to move the elbow back and release the bowstring. No matter how long you wait, try to maintain a constant counter-tension by securing the bow as you draw it without allowing it to straighten out.
Inertial movement
The inertial movement consists of the natural retraction of the drawing arm back after the shot. In this case, the hand holding the bow remains in an extended position until the arrow hits the target, and the eyes follow the entire flight of the arrow to the target.
WARMING UP BEFORE SHOOTING
To further improve your shooting technique, the following set of exercises and warm-up activities is recommended. All athletes must warm up before starting
to perform one or another exercise that requires great effort. Archery may not seem like such an active sport to many, but be that as it may, it also has an impact
influence on muscles and joints. Has it ever happened to you that you picked up a bow and noticed that at the first draw, your muscles and joints began to ache and ache a little? This happens because
that they are experiencing stress for which they are not yet ready, and this can lead to serious and possibly long-term injury. Therefore, a few extra minutes spent warming up before shooting will not only help you avoid possible injury, but will also affect the accuracy and accuracy of the first shots.
Stretch not only the parts of the body involved in drawing the bow, but also the entire body to get the blood circulating more actively. Start with regular jumping jacks for 35-40 sec. This will allow you to stretch your entire body and, importantly, your shoulder girdle. We We understand that some may
It’s not very comfortable to warm up this way in public and their can be understood. In this case, an alternative option is that you can simply start with a partial bow draw and gradually work your way up to full draw without experiencing any discomfort. Perhaps over time you will develop your own better way to warm up. All in your hands. In any case, our body must be prepared for the stress of constantly drawing the bow.
TECHNIQUE IMPROVEMENT EXERCISE No. 1
This drill does not require placing or releasing arrows, but is very important for developing proper shooting technique. All you need is a bow and a mirror. Just take the correct stance, draw the bow, lock it in that position and
lower it slowly. At the same time, look in the mirror. Are you doing all of the above correctly? Repeat the exercise until you are completely sure what the correct shooting technique actually is. If you notice
error in performing one or more elements, repeat the exercise until everything is correct. Once you're done with this, move on to exercise #2.
TECHNIQUE IMPROVEMENT EXERCISE No. 2
For this exercise you will need a bow, one arrow and a bag target. Secure the bag at chest level and make sure there is a safe area behind it to stop the incoming arrow if it misses.
Stand in front of the target at a distance equal to the minimum flight of the arrow from the bow to the target. The distance between you and the target should be such that the arrow, having stuck into the target, does not
touched the outside of the bow.
This exercise consists ofreleasing an arrow at a target witheyes closed. And this is the only circumstance in which you should close your eyes when shooting an arrow! This exercise will help you better concentrate on the correct execution of all elements of the shooting technique, without being distracted by foreign objects and without worrying about whether the arrow will hit the target or not.
So, first, take the correct stance directly in front of the target so that the arrow immediately hits it as soon as you release the bowstring. Now raise the bow, close your eyes and release the arrow using proper shooting technique. This is the only thing you should care about at this moment. While your eyes are closed, mentally and tactfully check all the elements of the technique as you draw and fix the bowstring. Make sure you do everything correctly. In this exercise you need to concentrate only on yourself. Your brain must analyze every step from start to finish. If you feel like you're doing something wrong, go back to exercise No. 1 and correct the mistake. If the problem is releasing the string correctly, you will of course have to fire the arrow to correct any errors and develop a smooth motion.
We advise you to repeat this exercise until you have fired at least 800-1000 arrows this way. Additionally, we recommend shooting 5-10 arrows this way before each training session. You will not be a good intuitive archer until you have learned the basics of proper archery technique and practiced it so much that it is imprinted in your brain and becomes second nature. At the same time, don't go too hard! Don't try to shoot all 800-1000 arrows in one or even five days. Set your own training pace. Hone your technique
shooting only as long as you are still able to concentrate and perform all the actions correctly. Once you have fired at least 800-1000 arrows using proper shooting technique and feel confident with your bow, move on to the next step.
Basic exercises
for accuracy
Having perfected your shooting technique so much that it has become second nature and releasing an arrow no longer requires much thought and hesitant movements, you can move on to working on your accuracy and visual memory. Most likely, you will not hit the bull's eye with the first shots, even if the distance between you and the target is minimal. Don't be upset, this is how it should be! Your mind and body want the arrow to hit the target, but they have not yet learned to work together. By practicing a set of exercises and using the correct shooting technique, you will quickly lay the basis for future victories. The human body is an amazing machine that can quickly learn to perform a new task and learn from its own mistakes.
In the next set of exercises You you will shoot from predetermined distances. This will help you aim better at first. As your experience and knowledge grow, you will be able to hit a target from any distance because you will be using your already formed visual memory, and you will no longer need accurate measurements. As soon as you focus your gaze on the goal, the brain, having analyzed the situation, will send a signal to the body. And it, following the instructions of the brain, will itself correct the trajectory of the arrow’s flight. Ultimately, you won't need precise measurements anymore. Over time, you will begin to notice that your accuracy decreases at a certain distance from the target. The maximum distance to the target at which you can accurately hit the target is called maximum engagement range.
For basic marksmanship exercises, you will need a bow, one arrow and a target bag.
Place the target at chest level, making sure that there isthere is a safe space for stopping the arrow in case of a miss. Using a black marker, draw a circle in the center of the target with the diameter 5 cm . There are two reasons for using such a small target: firstly, you will be a short distance from the target; secondly, the smaller the goal, the more concentration and composure is required from you. Additionally, if you're looking to take up bowhunting, this exercise will teach you to hit the desired area of the animal's body instead of shooting randomly at the entire target. You will need a lot of composure and concentration.
so make sure there are no distractions, and most importantly, take your time to release the arrow.

During these exercises you will only shoot one arrow at a time. Firstly, thanks to this, the target field will be free all the time and nothing will distract you; secondly, so you
There is less risk of breaking or bending all your arrows. Warm up before each archery session and avoid overexerting your body and brain. If you begin to feel tired or weak, rest and continue your activities later. These basic exercises should be fun. At the beginning of each lesson, try shooting several arrows with your eyes closed, and after making sure that your shooting technique is correct, start doing the exercises.
PHASE ONE
At the first stage, the distance between you and the target should be one and a half meters. No more, no less! Stand in front of the target and take the correct stance. Focus your gaze on
small black circle in the center of the target.
Peer at it until all other foreign objects are no longer visible.
will begin to blur. Raise the bow without taking your eyes off the target. Stretch and lock the string and release the arrow directly into the center of the target. Don't forget to keep an eye on correctness shooting techniques. Follow the flight of the arrow all the way to the target. Pull the arrow out and shoot again.
cant bow to the side more or less than before, or turn your body slightly to the left or right. Changes in body position necessary to change the trajectory of the arrow,at this distanceso small that
you may not even notice how everything will happen. And as long as you fire the arrows with the correct technique, your body will most likely do all the necessary work on its own.
amendments.
Continue until beginning No, place 9 out of 10 arrows in a 5-centimeter circle from a distance of one and a half meters And
until you hit the target exactly, at least
500 times.
This number of hits from this distance allows you to say with confidence that you have fired enough arrows to
having noticeably improved your shooting technique and developed visual memory, so that now every time you
shoot from a given distance, your body
will guide the bow itself. This is very importantlearning phase, so don't cheat and don't exhaust yourself too much.

Never mind that for a successful release 500 arrows will take you a lot of time and effort; Each archer has their own ability to learn and the speed of skill development. Most importantly, do not forget to monitor the correct shooting technique. Hard work and a positive attitude will definitely bear fruit. You may not want to stop there after 500
hits and continue practicing in order to feel more confident in handling a bow and to better develop visual memory. But how
only you successfully release, at least, 500
arrows and you will feel confident, move on to the second phase.
PHASE TWO
This exercise is similar to the first phase, with one exception - this time you will shoot from a distance of 3m (i.e. the distance doubles). At first glance, it seems that the jump is not that big, however, after firing the first few arrows, you
You will quickly realize that not everything is so simple.
Remember to warm up before each archery session and practice proper shooting technique with your eyes closed.As in the case of the first phase, continue to practice untiluntil you begin to place 9 out of 10 arrows on the target and hit
target at least 500 times. Fire only one arrow at a time and take your time between shots. Practicing the correct shooting technique and forming visual memory are the main goals of this exercise. Once you have hit the target at least 500 times and feel more confident with your bow at that range, move on to the next phase.
PHASE THREE
At this stage, you again double the distance between you and the target, i.e. now it is already 6 m. And again the same requirements. Warm up and perform exercises on the correct
shooting technique with closed eyes before each lesson. Most likely, you will decide that a 5-centimeter circle at such a distance looks too small. Right! The smaller the target, the more composure and concentration you will need to hit it. You will also notice that the overall visual image has also changed. Now, in your peripheral vision, in addition to the target, you will begin to notice more foreign objects. However, do not forget that the main thing for you is the target, so focus your gaze on it so that everything else around you is focused on it.
second plan. Nothing has changed except the distance. Now you can shoot three arrows so you don't have to constantly run after each one. And, as before, continue until you begin to lay
9 out of 10 arrows hit the target from a distance of 6 m. And don't worry if it takes you a long time. It's a learning process and you'll get better at it over time. Once you feel more confident at a given distance and have hit the target at least 500 times, move on to the next phase.
PHASE FOUR
Again, double the distance to the target - up to 12 m. It is better to shoot from such a distance at a target installed not at chest level, but lower - at waist level. Use a black marker to enlarge
mug size up to 10 cm. Don’t worry, 12m is not that big
long distance. Just continue to use proper archery technique and warm up and do all the necessary exercises before each archery session. The conditions for moving on to the next phase are the same: as soon as you start placing 9 out of 10 arrows on the target and hit the target at least 500 times, you are ready for the next exercise.
PHASE FIFTH
 |
At this stage, the distance between you and the target will not increase as much as in previous phases, since you are now approaching a distance that for some archers becomesmaximum range of accurate target destruction.Now you will shoot from a distance of 18 m. And again the same requirements for performing this exercise. At this stage, you will only need
Archery training. The archery section of our website contains information about almost all famous archery clubs and sections in Moscow and Russia. If you have information about the existence of a section (club) that is not on the list, you can add it. Choose a suitable place for you to practice archery. In most sections, archery classes for children are free. Recruitment of children and adults into the section usually takes place at the beginning of the school year (September), but most coaches continue to accept newcomers throughout the year. In sports schools, as a rule, beginners are given a bow for beginners, arrows and the necessary equipment. As a last resort, you can buy a shooting bow in numerous online stores that sell bows, crossbows and related products. The cost of a bow for a beginner is about 3 thousand rubles. Join us. Just one warning: Archery is a very addictive sport, it can drag on for a long time;-)
NEWS section in the world of archery. This section constantly publishes news happening in the shooting sport, the opening of new sections or clubs, competitions, archery tournaments, changes in competition rules, interviews with coaches and archery athletes, and much more. You can publish your announcement (article, news) about an upcoming (or past) competition, tournament, or other event. Please indicate the coordinates of the organizers, date, location, etc.
In this material I will try to introduce the basics of archery techniques for beginners. Let me make a reservation right away: there are various shooting techniques, but I will focus on the one that I use myself. In addition, I note that when shooting, a traditional bow is used, not a sports bow, without a special handle and a central strike. It should also be taken into account that the material is written for right-handed people.
Archery Technique for Beginners: Drawing the Bowstring
Common mistakes when archery
Each shooter chooses the features of his stance, grip, the point to which he pulls the bowstring, and methods of aiming, but there are a few simple rules, which we set out below. In the future, the shooter should strive to ensure that his shooting technique remains unchanged from shot to shot.
The first thing to do when shooting a bow is to get into a comfortable position. Before shooting, the archer stands with his left side to the target, with his feet shoulder-width apart or slightly wider. The archer stands with his toes on a conventional straight line that leads to the center of the target. This stance allows the shooter to stand confidently and steadily and relax between shots (photo 1).
photo 1
With the left hand, the archer grasps the handle of the bow approximately in the middle (as a rule, there is a special grip point on the bow (photo 2). The hand that holds the bow in weight experiences the elasticity of the bow when tensioning and lowering the bowstring. If the archer’s left hand trembles, moves at the moment of shooting before the arrow has left the bow, it will be impossible to achieve accurate shooting.Beginner archers in medieval England stood for hours with a stick and an outstretched left arm, obtaining its strength.

photo 2
The hand holding the bow should not interfere with the movement of the bowstring, otherwise the shot will not only be weaker, but the shooter himself may receive a painful blow to the hand. Therefore, the elbow joint needs to be moved slightly to the side with a small rotational movement of the hand or the bow should be moved slightly to the right with the hand, but this can complicate the shot itself, due to additional stress on the hand and thumb (photo 3).
photo 3
The arrow is placed on the bowstring, holding it by the shank (in no case by the fletching!!!) so that the guide feather is from the bow (if the arrow has three feathers) and placed on the hand holding the bow (photo 4). Sometimes, to prevent the arrow from falling off the hand, archers hold it slightly with their index finger (the finger must be removed at the moment of shooting) or tilt the bow slightly, twisting the left hand clockwise.
photo 4
The position of the fingers that hold the arrow is shown in the photograph (photo 5). The index finger is above the arrow, and the middle and ring fingers are below it. The string lies between the first and second knuckles. In this case, the fingers pull back the bowstring, and only slightly hold the arrow. The load on the fingers should be even.
photo 5
Before shooting, the archer takes a stance, checks its correctness (position of the torso, arms, legs and head), places the arrow, and evaluates the conditions for the shot. The shooter must not forget that his actions in preparation for the shot and the shot itself should not diverge from shot to shot. When a novice archer shoots, he often rushes and makes a shot without standing confidently, twisting his body, etc. Such mistakes prevent him from making a good shot.
photo 6
Having taken the starting position before the shot, the shooter raises the bow to shoulder level, straightening his left arm (photo 6), and then stretches the bow until the bowstring touches the front surface of the chin (some pull the bow to the ear). The arm is bent at the elbow joint so that the hand is as close to the neck as possible, and the forearm and shoulder, forming an acute angle, are almost in the same horizontal plane (photo 7). Stretching the bow is carried out only by tension in the posterior bundles of the deltoid muscle and the muscles (the shooter seems to bring the shoulder blades together) that retract the shoulder blade back. The nail phalanges and the finger flexors that hold them perform the function of gripping the bowstring.

photo 7
The bow is pulled along the hand that holds the bow to the so-called “anchoring” point, that is, the point to which the shooter pulls back the string and makes a short delay before shooting.
One of the methods of “anchoring”, which the author of these lines also uses, is a method in which the bowstring is pulled to the middle of the chin, the thumb of the right hand is placed under the jaw, the jaws are clenched (photo 8).

photo 8
Unlike a sports bow, a historical bow does not have special sighting devices. It is also impossible to aim according to the projection of the bowstring, since in a peripheral bow this will not help, in addition, when pulling the bowstring back to the ear, this is physically impossible. The author of these lines uses so-called “intuitive aiming” when shooting. Intuitive aiming occurs in a similar way to when a person, for example, throws a stone at a target. The brain itself calculates the desired trajectory, but accurate shooting with intuitive aiming is achieved through constant practice and regular shooting. In addition, the shooter must constantly be aware of proper stance, grip and breathing to maximize shooting conditions.
Continuing to pull the shoulder blades towards each other, the shooter relaxes the fingers holding the bowstring, making a shot. At the same time, the hand holding the bow must be strictly fixed. Usually, when shooting, novice shooters make two typical mistakes:
- Before firing, the hand holding the string follows the string before the fingers open, which weakens the shot itself.
The left hand holding the bow is not fixed, and then when the bowstring is released, it begins to move to the side even before the moment when the arrow leaves the bow. As a result, the arrows go to the left.
Before firing, the shooter must calm his breathing. The shot itself is made half-exhaling.
|
photo 9 |
photo 10 |

After the shot, there is one more stage that novice shooters often forget about when moving straight to the next shot - follow-up. During this phase, the shooter tracks the arrow, makes adjustments to subsequent shots, and corrects errors. At the moment of following, the archer maintains his position for some time after releasing the bowstring, analyzing the shot made. Now you can proceed to the next shot.